Browsing API Docs in GraphiQL
Objective
In this section we will do a walkthrough on how to use GraphiQL to explore our API and its documentation. The goal is to understand how GraphQL queries can be derived from the API documentation and a JSON result obtained by executing those queries.
1. Open the in-browser GraphQL IDE
To start, let's open the interactive in-browser GraphQL IDE by clicking here.
NOTE: The GraphiQL application served by above link serves a development
version of the API. If you are integrating against a release version of 21
Travel then you should use GraphiQL served via the /graphiql endpoint of your
instance.
2. Reveal the docs
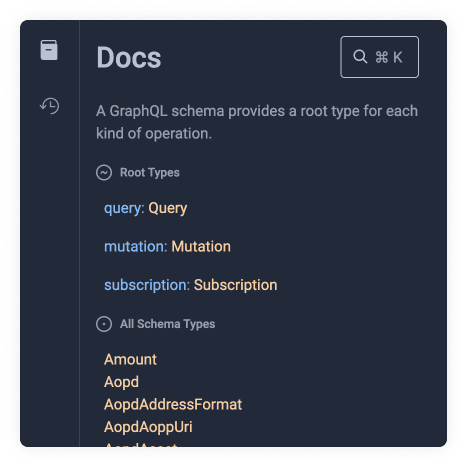
To reveal the docs in GraphiQL you must press the book icon button on the top left of the screen.

This will reveal a set of options and definitions.
You might see an introductory set of comments when visiting for the first time.
Comments start with # followed by the comment text. We can go ahead and delete
all the introduction comments.
3. Root Types
These types are specific to GraphQL. The most common root type is the Query
type. To query data, we need to write query followed by some curly braces.
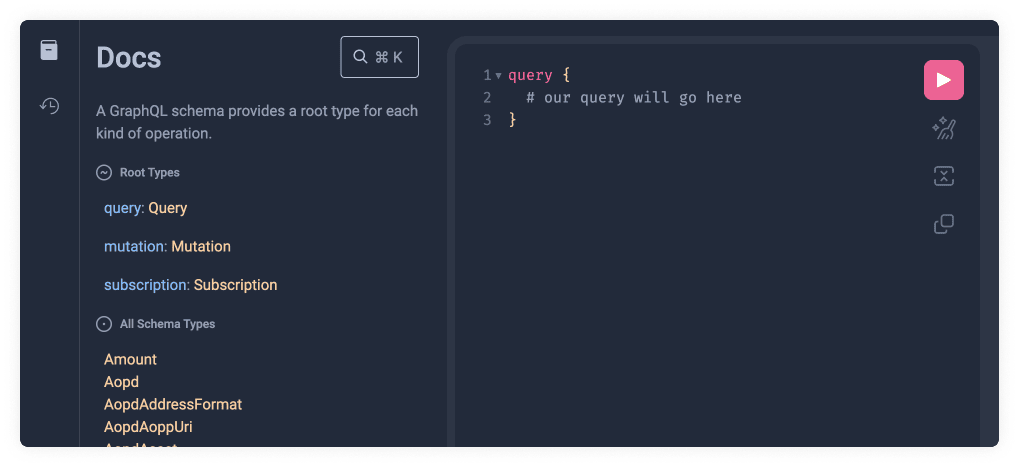
Copy the following code snippet into GraphiQL:
query {
  # our query will go here
}
Let's now click on the orange Query Type link (shown below as 2️⃣) on the docs.
This will unveil the query Schema Types available which we will explore in the
next section.
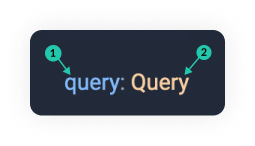
As you can see the field names(1️⃣) are shown in blue and camel-cased and the types(2️⃣) returned by that field are shown in orange and capitalised.
4. Schema Types
These types are specific to the 21 Travel Rule API. These can be found inside
the Root Types. Once we have clicked the Query Type link(2️⃣) we can find the
available Schema Types. We will choose one of these and add it within the
brackets. There is an auto-complete list of options available to guide us. We
will select the autod field.
To do this, copy the following code:
{
  autod {
    # nested query
  }
}
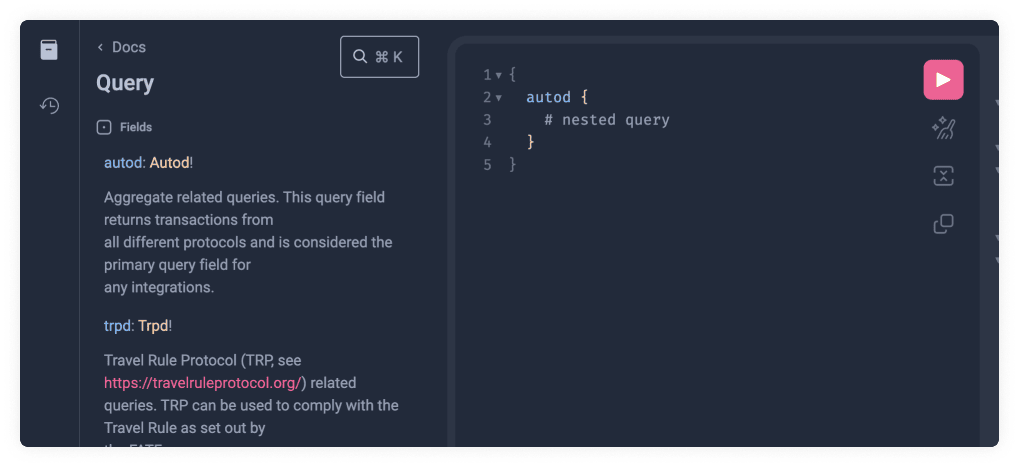
Let's now run the query by clicking the pink play button and see what happens.

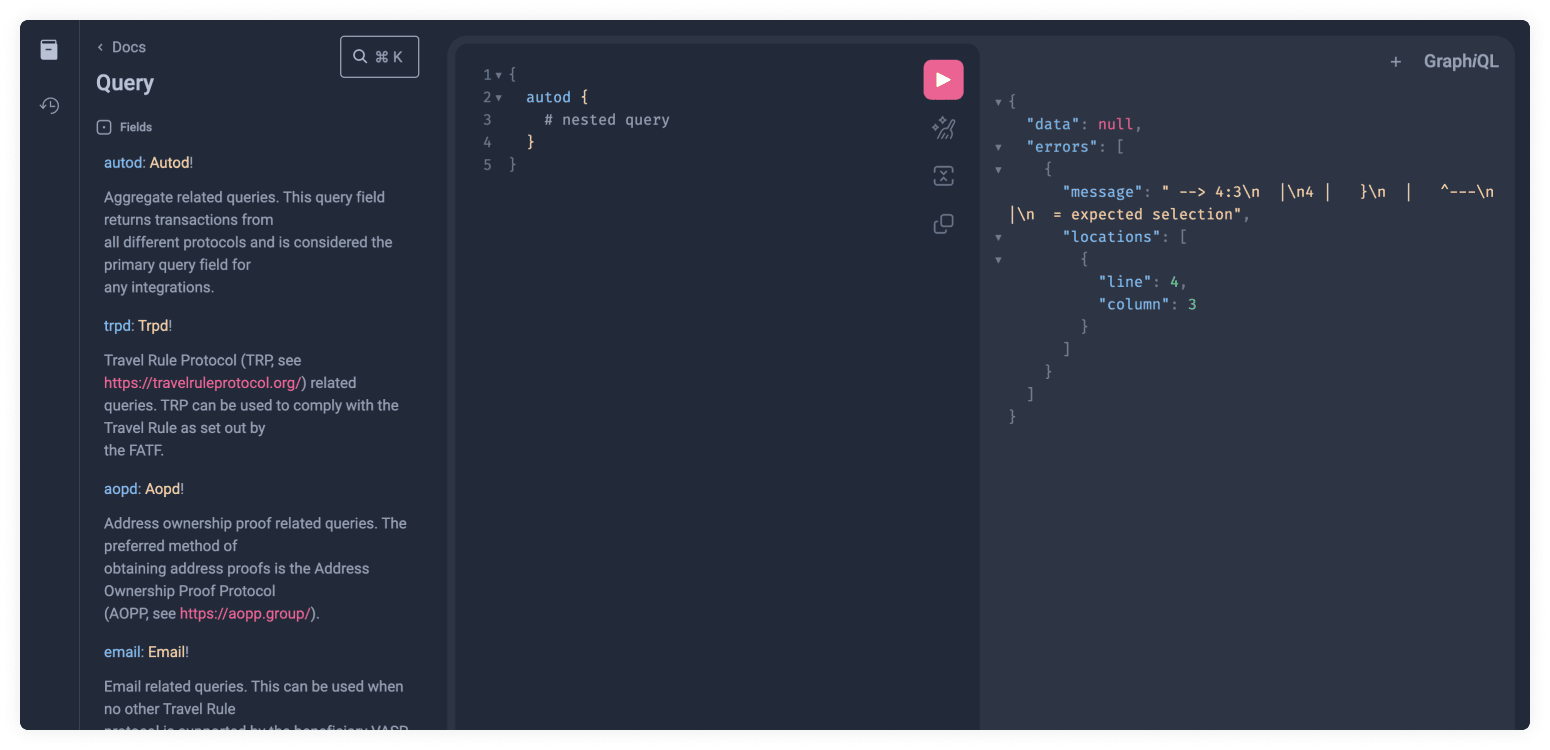
As you can see this will still not work since it has a Nested Type, which we
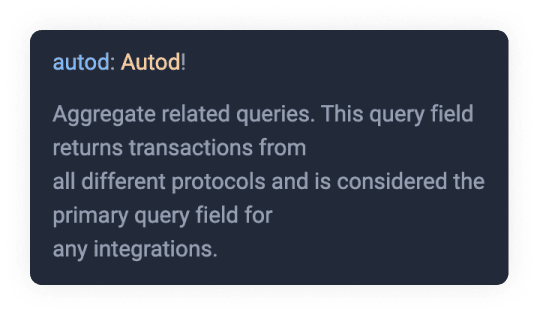
will explain in the next section, so an error is thrown. We can now click on the
orange Autod type link like we previously did with Query. We can also see a
description of what the field does.
Another important thing to remember is the ! bang symbol. This means the Data
Type is not optional.
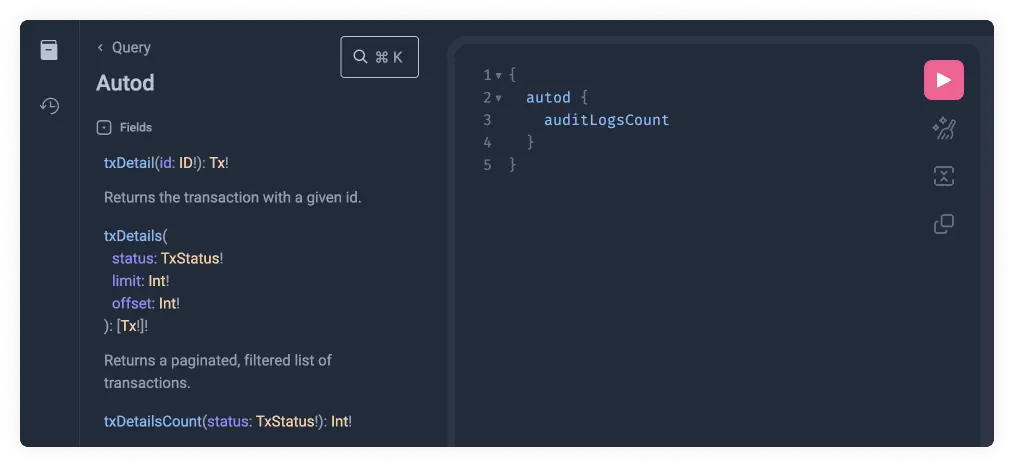
5. Nested Types
You will often find a field with other Schema Types available within it. This can have multiple levels of nesting until we reach the returned value. Let's start by retrieving a field value only two levels deep, and we can explore deeper nesting in our next step, where we explain arguments.
Copy the following code into GraphiQL:
{
  autod {
    auditLogsCount
  }
}
We can now click on the pink play button to finally run the GraphQL query and return its result. Such queries can be copy-pasted into client applications and used to for automation, integration or user interfaces.
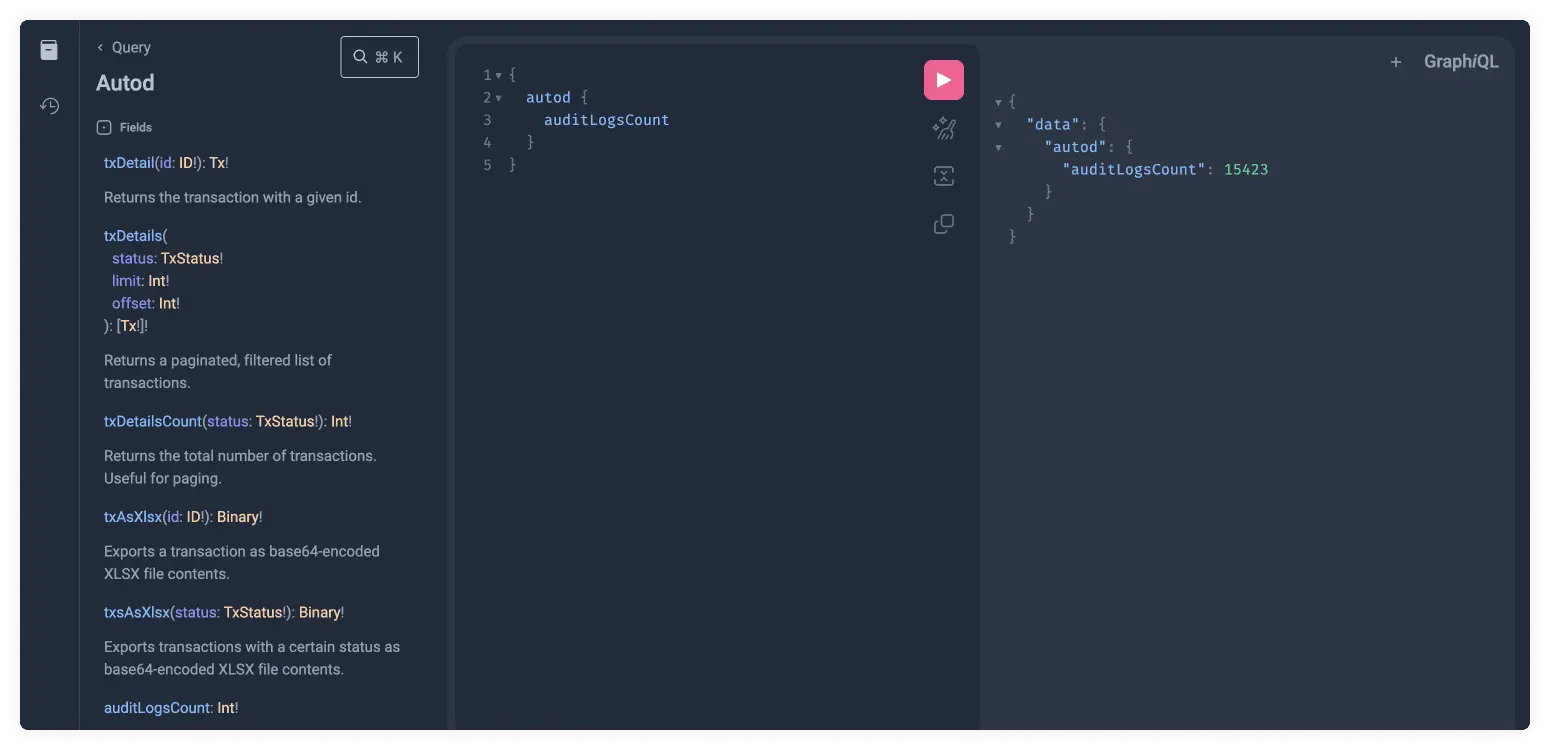
Now that we understand the basics of how nesting works in GraphQL, let's have a look at arguments.
6. Arguments
We previously defined what an argument is. Let's get hands-on with how these look in GraphQL.
Some types require arguments. You can find these between parentheses. They
usually serve as a kind of filter for the data you want to retrieve. We will
look at the auditLogs field:
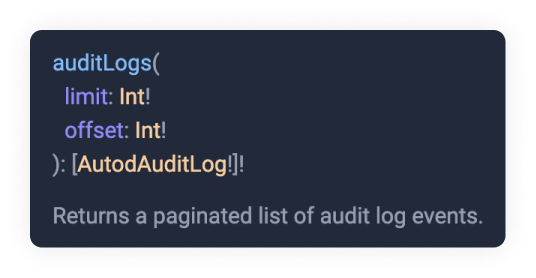
Here you can see two required arguments limit and offset. As a reminder, any
argument or type with a ! bang sign means it is required. We can see they both
require an Int type. These data types are primitive types. As you can probably
guess Int stands for Integer and you can read the full definition if you press
on the orange link.
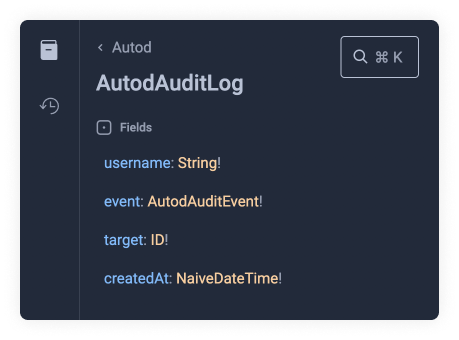
This introduces a new level of nesting. Since it is wrapped with square brackets
it will return an array. This array is also required and has to be of type
AutodAuditLog. Let's click on the AutodAuditLog orange link and see what
fields we have available there.
We will choose username and event within auditLogs. Let's not forget the
required arguments limit and offset.
Copy the following code snippet to see the results:
{
  autod {
    auditLogsCount
    auditLogs(limit: 2, offset: 0) {
      username
      event
    }
  }
}
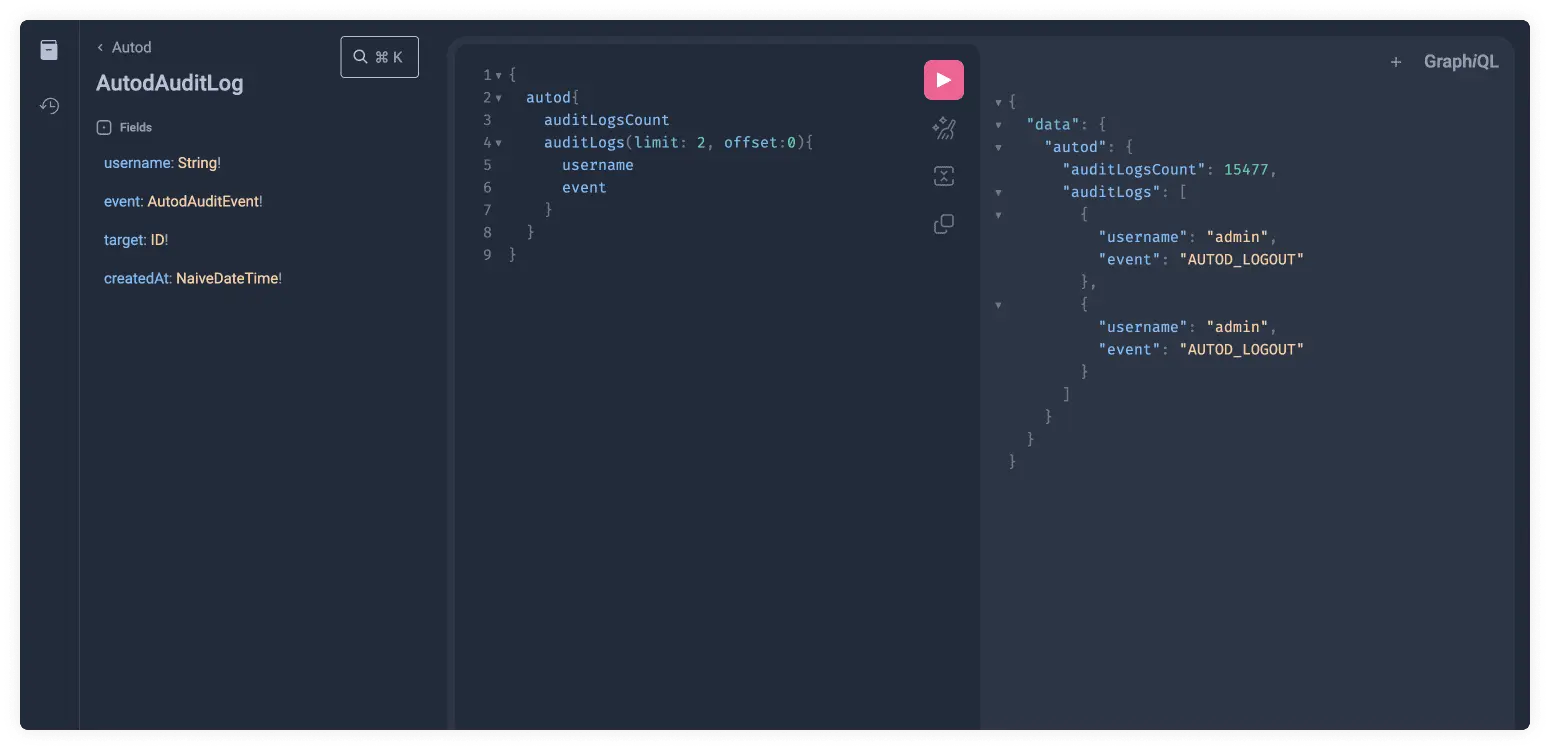
You might have noticed that the event field is not a Primitive Type, yet it gave
us a value. This is because it does not nest another type but defines an enum.
This can easily be seen by clicking on the orange AutodAuditLog link.