TRP
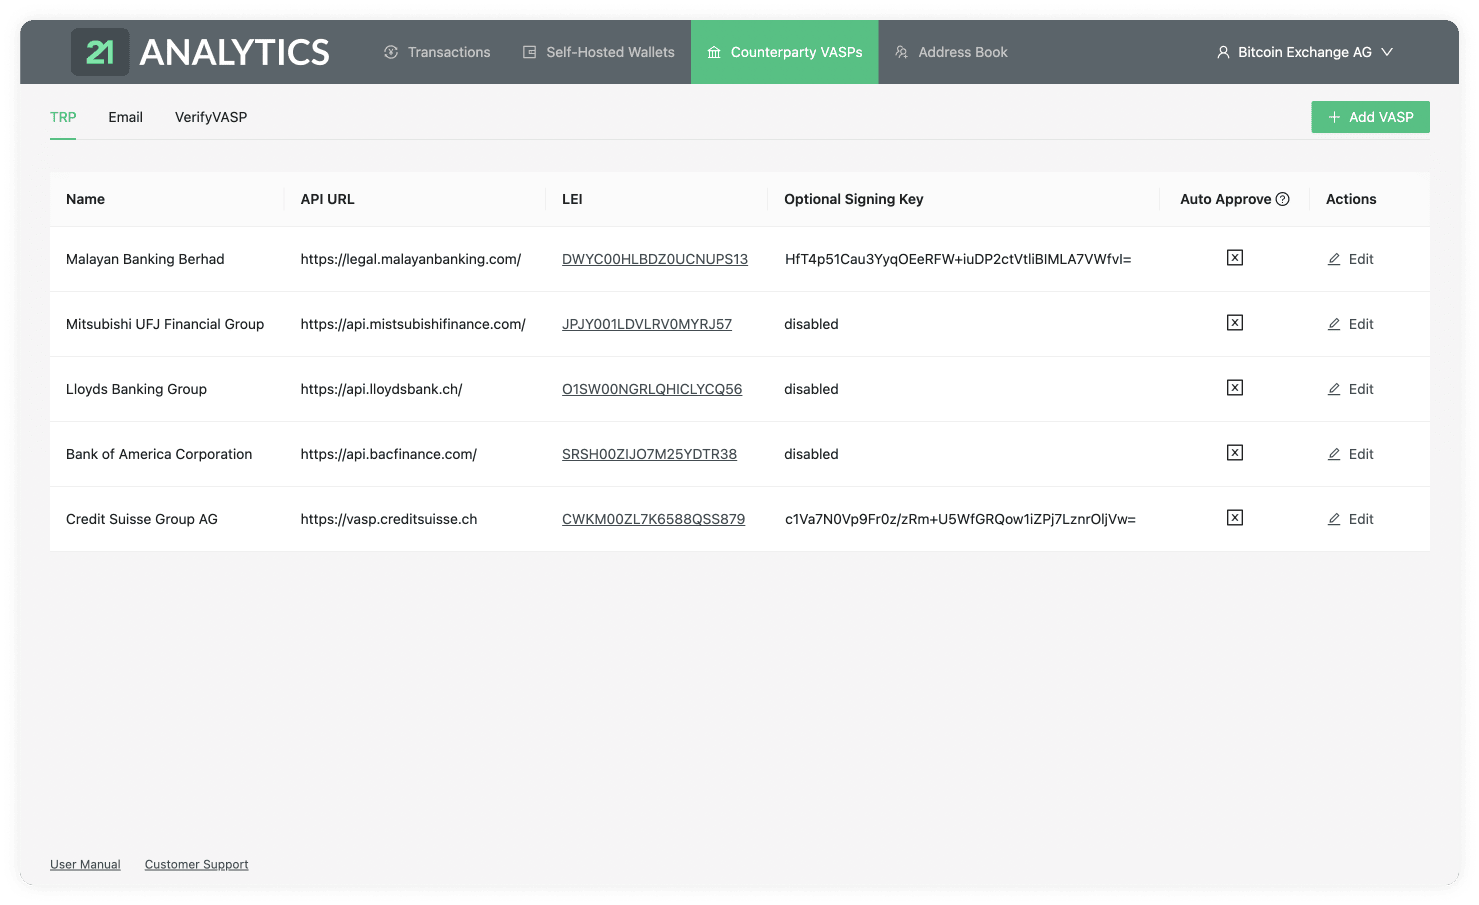
On the Counterparty VASP page you can find the TRP tab.

Here you will find a table with a list of vasps your team added choosing the TRP protocol.

This table contains the data introduced by you or someone with access to the account. To add additional VASPs you should use the Add VASP button stated previously and choose the TRP tab. This table has the following columns:
Name
List of the chosen VASP names associated with the LEI (Legal Entity Identifier).
API URL
The list of URLs associated with the LEI (Legal Entity Identifier). This is required to establish a connection through TRP (Travel Rule Protocol).
LEI
A list of LEIs (Legal Entity Identifiers). This is provided by the counterparty VASP when it is added to the table.
Optional Signing Key
The list of signing keys provided by the counterparty VASP.
This field is optional; if your team decides not to use it, the text will be disabled in this field. Ensure your IT team has also provided your own Public Signing Key to the counterparty VASP for communication to work correctly with additional security.
Auto Approve
This field is indicated if the auto-approve feature is enabled. You will see either a tick or a cross within a box.

If you see a tick, it has indeed been activated, and all the steps in the TRP flow will trust and accept all transactions that come from the associated counterparty VASP.

If you see the cross, it's disabled, and transactions will need to be approved or declined by you manually. This adds a layer of control and filtering if desired.
Actions
Here you can find the Edit button.

Clicking on this button allows you to change all the fields in the row except the LEI. The LEI works as the ID associated with all the previous transactions linked to this VASP; this can not be changed.

Once changes have been made you will now see two options under the actions column. These are Save VASP:

or Cancel:

which reverts all changes made.