Obtaining Certificates for TRUST
This page gives a basic introduction to the certificates typically needed for TRUST and a simple ordering flow using DigiCert and X9.
mTLS, Server Certificates, and Client Certificates
TRUST connections use mutual TLS (mTLS). In a normal TLS connection, only the server proves its identity with a certificate. In mTLS, both sides present a certificate:
- The server certificate identifies your TRUST PII endpoint to counterparties.
- The client certificate identifies your system when it connects outbound, for example to the TRUST bulletin board or another TRUST participant.
In 21 Travel Rule, the TLS Server Identity must be valid for server
authentication and the mTLS Client Identity must be valid for client
authentication. If you order one certificate that supports both usages, you can
use the same PEM identity in both fields.
When preparing the certificate request, use the DNS name of your TRUST endpoint and keep it aligned with the domain you use during TRUST onboarding and bulletin board registration.
What X9 Is
X9 is a PKI framework specifically intended for the financial-industry. It is the recommended PKI to use in the TRUST ecosystem for certificate-based identity. Note though that TRUST admits a set of different root Certificate Authorities beyond DigiCert (as of March 2026 e.g. GlobalSign or GoDaddy).
Step-by-Step: Order a Combined Certificate
The following explanations reference the DigiCert user interface as of March 2026. Expect small deviations to possibly occur.
1. Prepare the Required Information
Before you start, collect the following:
- Your legal entity name and address
- The DNS name of your TRUST PII endpoint
- The person who will administer your DigiCert account
If you want to use a single identity for both inbound and outbound TRUST
connections, plan to order one certificate that supports both serverAuth and
clientAuth.
2. Create a DigiCert Account
- Go to DigiCert and create a company account.
- Verify the email address of the administrator account.
- Complete the organisation profile with your legal entity details.
- If DigiCert requests business validation documents, provide them and wait until the account is approved.
At this point, you should be able to access your DigiCert certificate management portal.
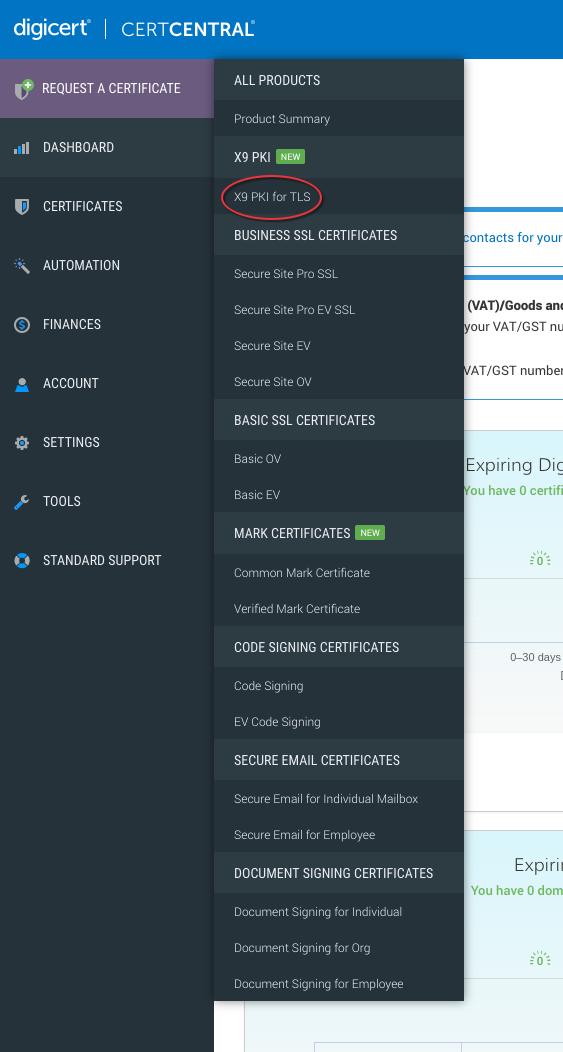
3. Request Access to X9
Not every DigiCert account shows X9 products by default. If you do not see X9 certificate products in the portal, ask DigiCert support or your DigiCert sales contact to enable X9 certificate ordering for your account.
Once that access is granted, X9-backed certificate products should become available in the ordering flow.
4. Create a Certificate Signing Request (CSR)
During the ordering process, you will need to provide a Certificate Signing Request. For this, you need to obtain your TRUST domain that was provided during TRUST onboarding.
Using this, the CSR can be generated as follows by your tech team, assuming
mydomain is the aforementioned domain:
$ openssl req -new \
  -newkey rsa:2048 \
  -nodes \
  -keyout mydomain.key \
  -out mydomain.csr \
  -subj "/CN=mydomain" \
  -addext "subjectAltName=DNS:mydomain" \
  -addext "extendedKeyUsage=clientAuth,serverAuth"
This will generate two files:
mydomain.key: The private key to be used for the identity. Keep this secure.mydomain.csr: The signing request. You will need this in the next step.
5. Order a Combined Server and Client Authentication Certificate
- Start a new certificate order in DigiCert.
- Choose the X9 certificate product made available for your account.
- Paste the CSR you generated in step 4.
- Ensure that the "Common name" and "SANs" are automatically pre-filled.
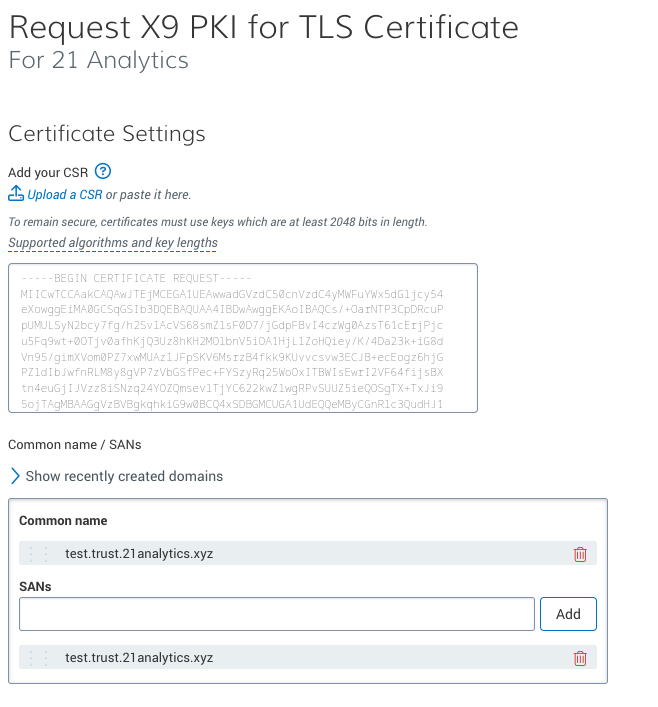
- Under "Additional certificate options", make sure the requested certificate profile includes both server authentication and client authentication.
- Submit the order and complete any validation steps requested by DigiCert.
The resulting certificate will be usable both:
- as your server identity for incoming TRUST mTLS connections
- as your client identity for outgoing TRUST mTLS connections
6. Export the Final PEM Identity
After issuance, export the certificate chain and private key in PEM format. 21 Travel Rule expects each identity as PEM data containing:
- exactly one private key
- the end-entity certificate
- the required certificate chain
If you ordered one combined certificate, you can upload the same PEM identity to
both the TLS Server Identity and mTLS Client Identity fields in
Configure Your VASP > TRUST.
Practical Notes
- Keep a copy of the issued certificate chain and private key in a secure secrets store.
- Renew the certificate before expiry and update both TRUST identity fields if you use the same combined certificate for both.